Building a pole barn garage can be an exciting endeavor, especially if you're someone who enjoys working with your hands. Whether you need extra storage for vehicles, equipment, or simply want a space to pursue your hobbies, constructing a pole barn garage can cater to all those needs. The beauty of a DIY pole barn garage lies not just in its utility but also in the satisfaction that comes from creating something with your own two hands. In this guide, we’ll walk you through everything you need to know about building a DIY pole barn garage, providing you with the confidence and knowledge you need to tackle this project head-on.
What Is a Pole Barn Garage?
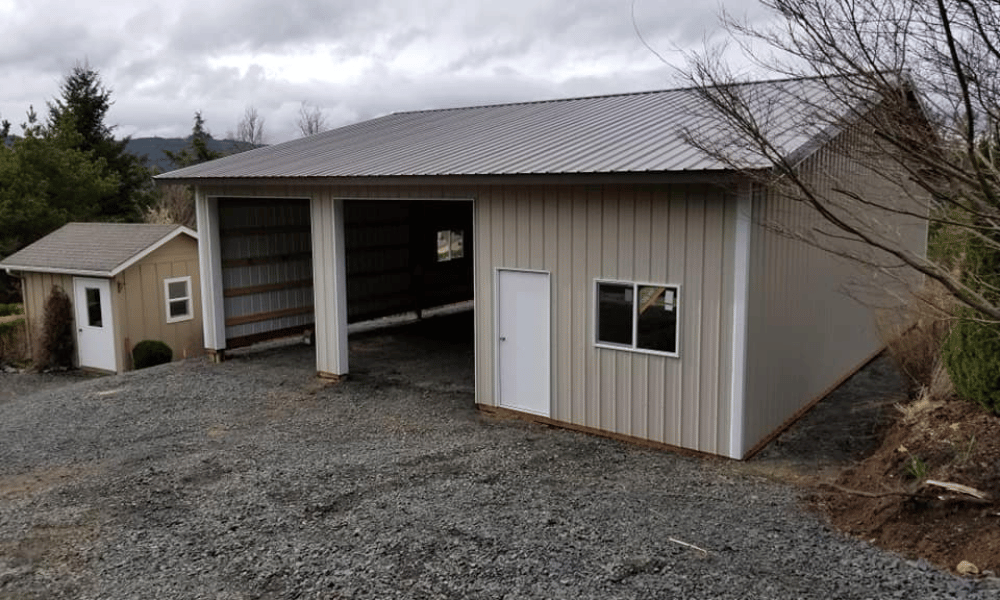
A pole barn garage is essentially a structure that utilizes poles as its pole barns primary support system. These poles are typically embedded into the ground and provide the framework for the building. Unlike traditional garages that require extensive foundation work, pole barns are relatively easier and quicker to erect. They are often made from wood or metal and offer versatile design options that can cater to specific needs.
The Benefits of Pole Barn Garages
Cost-Effective: Building a pole barn garage tends to be less costly than traditional structures due to lower material costs and simpler construction techniques.
Quick Construction: Since the building relies heavily on vertical poles for support, the construction time is significantly reduced.
Versatility: You can customize your pole barn garage according to your needs, whether it’s for parking vehicles, storing tools, or even as a workshop.
Durability: With proper materials and maintenance, pole barns can withstand various weather conditions.
Easy Expansion: If your needs change in the future, expanding your pole barn is generally straightforward.
Planning Your Pole Barn Garage Project
Before jumping into building your dream garage, it's crucial to plan carefully and consider several factors.
Define Your Purpose
Why do you want a pole barn garage? Are you looking for additional storage? Or perhaps you envision it as a workshop? Defining its purpose will guide you in making design decisions later on.
Choosing the Right Location
Selecting where to build your garage is vital. Consider accessibility, zoning regulations, proximity to utilities (like electricity), and how it fits into your property’s landscape.
Checking Local Regulations
Before starting construction on your DIY pole barn garage, verify local building codes and zoning laws. You may need permits depending on where you live.
Creating Your Budget
Establishing a budget will keep your project on track financially. Factor in materials, labor (if needed), permits, and any other costs like landscaping or driveway installation.
A Step-by-Step Guide to Building a DIY Pole Barn Garage
Now that you've laid the groundwork for planning let’s dive into the step-by-step process of actually building your DIY pole barn garage!
Step 1: Gather Materials and Tools
You'll need several materials for this project:
- Pressure-treated wood or steel poles Plywood or metal siding Roofing materials (metal sheets or shingles) Concrete mix Fasteners (nails/screws) Insulation (optional)
Essential Tools
To ensure smooth construction:
- Hammer Circular saw Level Trowel Measuring tape Drill
Step 2: Mark Out Your Site
Using stakes and string lines will help define where you'll build your structure. This step allows you to visualize how much space you'll have once it's built.
Step 3: Dig Post Holes
Dig holes deep enough (usually around three feet) to accommodate your poles securely. The spacing between posts largely depends on how big you'd like your structure but typically ranges from 8 to 12 feet apart.
Step 4: Set Poles in Concrete
Place each post into its respective hole and fill it with concrete mix for stability. Make sure they’re level before allowing them time to cure according to package instructions—typically about 24 hours.
Step 5: Build Frameworks
Once the concrete has set, start constructing horizontal frames between each vertical post at various heights based on design specifications—for example:
Bottom rail for walls. Top rail for securing roof trusses.This step is crucial as it forms the skeleton of your garage!
Step 6: Install Roof Trusses
Roof trusses provide essential structural integrity while allowing rainwater runoff without sagging over time. Securely attach these trusses according to manufacturer guidelines!
Step 7: Add Siding & Roofing Material
Choose between plywood sheathing or metal siding based on desired aesthetics! Attach chosen siding securely using nails/screws; follow similar steps when applying roofing material!
Step 8: Install Doors & Windows
Add functionality by including doors (think double doors for larger vehicles) and windows if desired—this step enhances both access/control while promoting natural light inside!
Step 9: Insulate & Finish Interior Walls (Optional)
Depending on intended use—consider adding insulation before installing interior walls! This addition makes climate control manageable during harsh weather conditions further enhancing usability year-round!
DIY vs Professional Help – What’s Best?
Should you tackle this project solo or hire professionals? This question often comes down personal preference coupled with skill level! Here’s how they stack up against one another:
| Factor | DIY | Professional Help | |----------------------|----------------------------------|-----------------------------------| | Cost | Lower overall expenses | Higher due labor/material costs | | Skill Required | Basic handiness/knowledge | Specialized expertise necessary | | Time Requirement | Longer duration | Quicker completion |
Ultimately weigh pros/cons based upon comfort levels/property constraints before deciding which route suits best!
Safety Precautions During Construction
Your safety should always take priority when engaging in any construction activity! Here are some must-follow tips:
Always wear protective gear like helmets/gloves/goggles. Utilize proper lifting techniques when handling heavy materials. Ensure all power tools are used correctly following their respective manuals. Keep children/pets away from the worksite until completion—safety first!Maintenance Tips for Your Pole Barn Garage
Once you've successfully built your DIY pole barn garage, maintaining it ensures longevity! Here’s how:
Regularly check roof integrity; clean gutters/debris buildup. Inspect wooden posts periodically—look for signs water damage/insect infestation! Repaint/reseal exterior surfaces every few years depending wear/tear observed. Ensure drainage around foundation remains clear preventing pooling water issues compromising structural integrity.FAQs About Building a DIY Pole Barn Garage
1. What is the average cost of building a pole barn garage?
The average cost varies widely depending on size/materials used but typically ranges from $10-$30 per square foot.
2. How long does it take to build a pole barn garage?
Construction duration depends largely upon complexity/design but often spans anywhere between two weeks up several months.
3. Do I need permits before starting my project?
Yes! It’s critical checking local regulations regarding zoning/building codes beforehand.
4. Can I insulate my pole barn garage?
Absolutely! Insulation can enhance energy efficiency while improving climate control during extreme temperatures.
5. What type of roofing is best suited for my DIY structure?
Both metal roofs/shingles offer durability; choose what aligns aesthetically with surrounding architecture!
6 .Are there any special tools required specifically for building garages compared regular sheds ? While many basic tools remain similar - certain specialized equipment like truss jig may ease assembly process ensuring accurate alignment!
Conclusion
In conclusion, constructing a DIY pole barn garage offers countless benefits—from cost savings down flexibility tailored exactly meet individual requirements! By following our comprehensive guide step-by-step approach outlined here today alongside utilizing safety precautions throughout entire process—anyone willing put forth pole barn garage styles effort can achieve successful results leaving sense accomplishment behind once completed!!
Embrace creativity harnessed within yourself embark upon exciting journey towards achieving dream space fulfilling all aspirations envisioned ahead!!
So roll up those sleeves; gather materials/tools necessary—it’s time turn plans reality enjoy endless possibilities await within newly constructed space designed specifically YOU!!